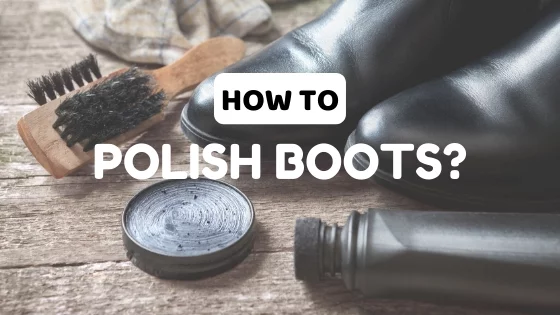
Whatever type of boots you wear on daily basis, keeping them in pristine condition is one of the marks of civilized people. Pristine condition can be achieved by polishing your boots in a proper way and with appropriate products. Polishing your boots not only give them brand new look but also nourishes them from dull and scuffed appearance.
 In this article, we will talk about three methods of polishing boots from simple polish to spit shine and to fire shine. With thorough step by step tutorials on how to polish boots according to these methods, you can achieve your desire shine. Boot polishing is something that you can do easily at home with some commercial or even homemade products. We will give you some useful information and tips about the use of those products. You can follow those tips whenever and as many times you want to bring your boots back into shiny and glossy look.
Step by Step Tutorial for Simple Polish
Step 1: Prepare your boots by removing laces and clean them for excess dirt with horsehair brush. Collect beforehand all of your supplies for polishing your boots. It is better to make your boots polish kit. For your help supplies are discussed in detail below with tips.
Step 2: Take an old cloth or a newspaper and cover the floor to protect it from stains. Because, leather polish either wax or cream and boot oils create a huge mess.

Step 3: Apply polish on one boot with a clean cloth and then let it sit. Then buff it with another clean cloth by moving hands side by side briskly. Repeat the same process for the other boot. Don’t forget to polish more visible areas of boots; such as, toes and heels. Also welt strips are important to polish, as they can affect the overall shining look of the boots. Apply a thick base coat on uneven surfaces of boots to give them even and smooth look. Use horsehair dauber brush with circular motion on the entire boot’s surface for even and thicker coating of wax without creating stripes.
Step 4: Finally, give your boots one last buffing by using chamois or any lint free cloth.
Step by Step Tutorial for Spit Shine Polish

Step 1 and step 2 are same as for simple shine.
Step 3: Take a small amount of polish with a clean dampen cloth or horsehair brush. Apply polish with circular motions to set it into the boots texture. Choose a wax of the same color as your boots are. Leave your boots for 15 minutes to get the polish dry and harden and then go to the next step.
 Step 4: Take a damp cloth or cotton ball and keep it dipped in water or rubbing alcohol to use it while applying successive layers of polish. Then buff your boots with slowly circular motions of slightly damp cotton ball to set the polish into the boots surface. In order to get a desired spit shine polish, use wax up to 5 times with buffing in a finer way by using damp clean cotton ball or cloth.
Step by Step Tutorial for Fire Shine Polish
 Step 1: Make your boots ready for fire shine polishing by removing any dirt or uneven stripes of previous wax. Use horsehair brush for thorough cleaning and rubbing alcohol dipped cotton cloth for better stripping.
Step 2: Burn the surface of your boot polish from inside the tin with the lighter turned on. Do not let the melted polish to drop on the floor and be careful while igniting your polish. Close the lid to extinguish the flame and reopen the tin to use. This step requires extra care and it is better to wear gloves while handling the boot polish tin and igniting the lighter.
Step 3: Apply this melted polish to the boots by wrapping a damp cloth already dipped in warm water around your fingers. Do this process with small circular motions to set the polish into the uneven surfaces of boots.
Step 4: Keep on applying successive layers of polish, to achieve your desired results, that depends on the texture of the boots. It is better to apply multiple light strokes of polish with damp cloth to work it evenly into the boots. Rather than applying one or two thick base coatings that can produce uneven strips on the surface of boots.

Step 5: Turn on your lighter or hair dryer (hot air) and blow it on the whole surface of your boots. This step will give your boots really extra fire shine and glow. Do not touch the flame with the boots and stop the heat once you will see melted polish on the boots’ surface. Leave your boots for 15 to 20 minutes to get them dried. Now give your boots one last buffing by using chamois or any lint free cloth.
Some Useful Tips
Some useful information about commercial and homemade products to be used during polishing your boots is as follows:

Tip 1: Use Water & Stain Repellent
Once you have done with polishing, it is better to spray some water or stain repellent. These repelling sprays will add a layer of protection against water and stains. You can use commercial leather protector and suede protector waterproofing sprays after polishing your boots. But make sure that you have given enough time to polish to dry and set into the boots.
Tip 2: Use the Best Boot Oils in the Town

As you know, boots get old and rough with more use and expose off in variety of weather conditions. Polishing your boots along with the proper use of specific type of oil for certain boot types can increase their life. You can get more information about the best boot oils from our latest review here.
 As far as homemade oils and products are concerned, you can use them without spending money for the longevity of your boots. They can nourish the leather of your boots. The list includes: Olive oil, Vegetable oil, Banana peel, Vinegar, and Petroleum jelly.
Tip 3: Choose the Best Products
Here I am going to discuss some products that must be the part of your boot polish kit. You can get better information about them to polish your boots.
 Rug or Cotton Cloth

It is used to set the wax coatings into the boots for even and shining look. It should be made of organic fiber such as cotton, rather than synthetic fiber.
Wax Shoe Polish
It should be harder and drier to get mold easily and give the boot a smooth shiny surface. You must be very careful while choosing the wax cream shoe polish. Our definitive review about the best boot polish for 2024 will help you explore top shoe polish types.
Horsehair Buffing Brush
It must have soft natural bristles like horsehair to set the polish and give a final buff to the boots.
Horsehair Dauber Brush
It also must have soft bristles like buffing brush to apply polish evenly without stripes.
Shoe Trees
Take a shoe tree to fit into your boots and to provide you a better platform to work with polishing.
Conclusion
You must polish your boots twice a month, but you can do it on daily basis if you wear them more often. Polishing will give your boots a long life, unfortunately it can darken your boots’ original color. But this darkness is not permanent; soon you will get your boots’ color back.